Tag Archives: datamosh

How to datamosh videos

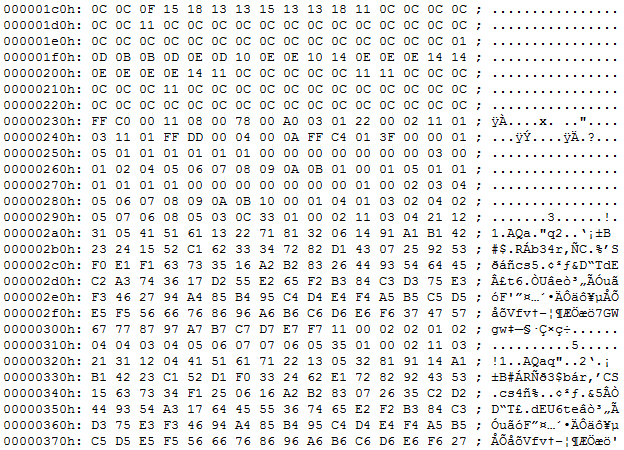
Datamoshing is the process of manipulating the data of media files in order to achieve visual or auditory effects when the file is decoded. In some cases the term datamoshing is used perfect Replica Watches best quality to describe this process applied to any type of media file — I like to think it applies solely to video since it results in moving images being moshed together. Regardless of the application of the term, datamoshing videos can be done quite easily with free, cross-platform tools.

Modern compressed video files have very complex methods of reducing the amount of storage or bandwidth needed to display the video. To do this most formats don’t store the entire image for each frame.

Frames which store an entire picture are called I-frames (Intra-coded), and can be displayed without any additional information.

Frames which don’t contain the entire picture require information from other frames in order to be displayed, either previous or subsequent frames, these frames are called P-frames (Predicted) and B-frames (Bi-predictive). Instead of storing full pictures these P-frames and B-frames contain data describing only the differences in the picture from the preceding frame, and/or from the next frame, this data is much smaller compared to storing the entire picture — especially in videos where there isn’t much movement.

When a video is encoded, or compressed, a combination of these types of frames are used. In most cases this means many P-frames with I-frames interspersed at regular intervals and where drastic visual changes in the video occur. More information on frame types can be found here.

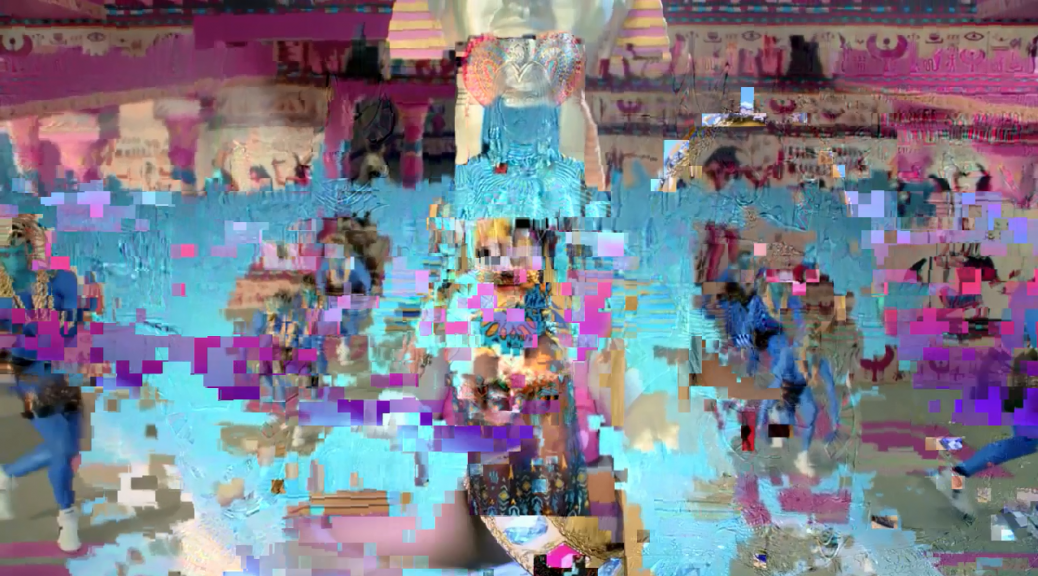
If an I-frame is corrupted, removed or replaced the data contained in the following P-frames is applied to the wrong picture. In the above video I-frames have been removed and so instead of scenes changing properly you see the motion from a new scene applied to a picture from a previous frame. This process of corrupting, removing or replacing I-frames is a very popular video datamoshing technique and what this tutorial will focus on.

Another video datamoshing technique involves selecting one or more P-frames and duplicating them multiple times consecutively. This results in the same P-frame data being applied to one picture over and over again, accentuating the movement and creating what’s known as a Bloom effect.

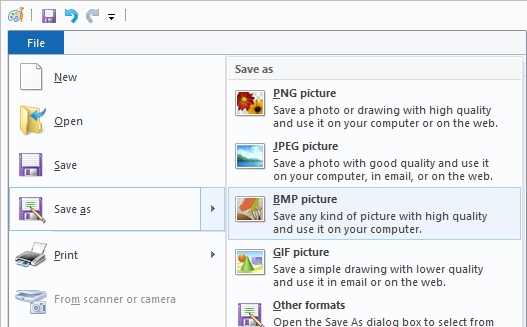
For this tutorial we’ll be using Avidemux, a free, cross platform video editing application. Generally the effects of datamoshing are viewed as errors, or undesirable and thus applications like Avidemux try their best to correct these errors and eliminate glitching distortion. For this reason the latest version of Avidemux isn’t very good for datamoshing, but some older versions, such as 2.5.6, available here, work just fine.

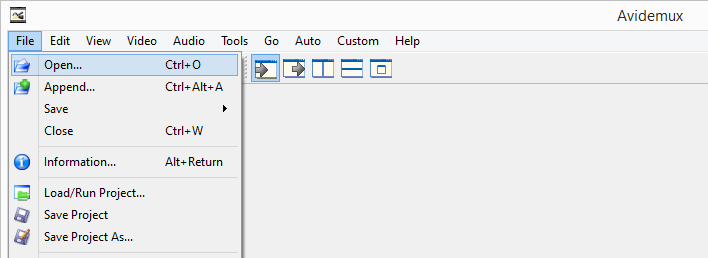
After downloading and installing Avidemux 2.5.6 Open the video you want to mosh.

avidemux-open

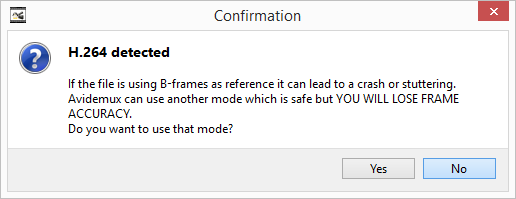
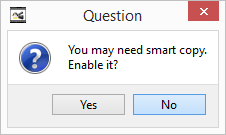
Avidemux may show warnings depending on the type of file you’re using, select No and continue.

avidemux-h.264-detected

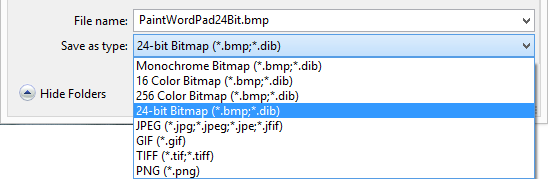
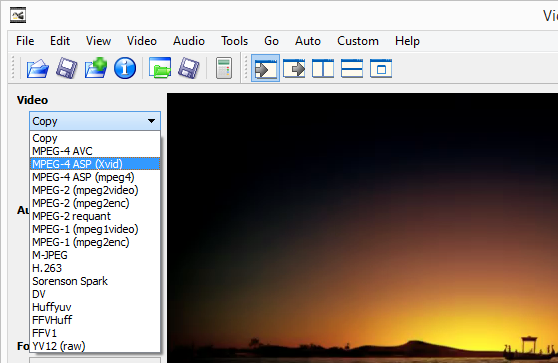
Once the video is loaded we’ll be making a small change to allow us to remove I-frames and still have a playable video. Under Video on the left side of the interface use the dropdown to change the selection from Copy to MPEG-4 ASP (Xvid).

Avidemux-Video

Next click the Configure button below the Video dropdown on the left. Select the Frame tab and then change the Maximum I-frame Interval from 300 to 99999999 then click OK. By changing this setting we’re allowing the video file to be played back even if it has unusually few I-frames, one every 99999999 frames.

Maximum-I-Frame-Interval

With this setting changed the video must be saved and then reloaded for it to take effect. Save the video with a new name to indicate that the Maximum I-frame Interval has been adjusted.

Avidemux-Save

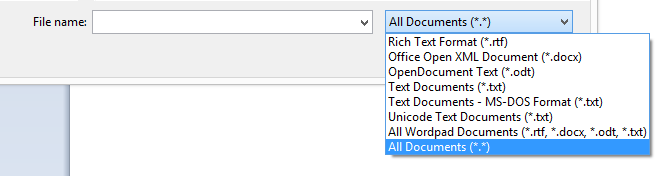
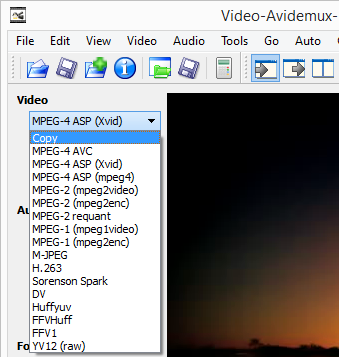
Open the new video, select No if Avidemux displays any warnings. Once opened, change the Video dropdown on the left side of the interface back to Copy. We won’t be changing the encoding or any settings of the video at this point, we’re just going to remove I-frames and then Save it.

Avidemux-copy

To remove I-frames we use the slider at the bottom of the interface, it displays the current frame type below the video navigation buttons, you’ll mostly see Frame Type: I (00) and Frame Type: P (00). The first frame will most likely be an I-frame and should be left in so that the video can start properly. To locate other I-frames click on the slider tab/grip to focus the slider then press the Up Arrow on your keyboard to jump to the next I-frame, the Down Arrow will jump to the previous I-frame.

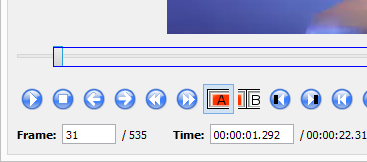
In order to remove an I-frame we must select it, this is done by marking an in point and an out point, these points are referred to as A and B in Avidemux and the frames of video between these two points are considered selected. Once you have found an I-frame click on the mark A button under the slider. You should see a blue border identify the new selection, starting at the slider grip and encompassing the remaining frames in the video.

Avidemux-A

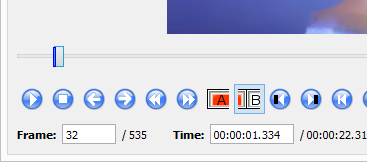
Pressing delete now would delete the current I-frame and all subsequent frames so we have to reduce the selection to only the I-frame. This is done be pressing the Right Arrow key to move to the next frame and then clicking the mark B button below the slider. The blue selection border should update to show only the I-frame selected as illustrated below.

Avidemux-B

Now that only a single I-frame is selected press the Delete key on your keyboard to remove it. To remove all the I-frames use the Up Arrow to move to the next one and repeat the removal process. Try to avoid moving backwards through the video once you’ve removed I-frames as this can cause Avidemux to crash, stick to moving forward through the I-frames and removing them.

After you’ve removed one or more I-frames, Save the video and again select No if Avidemux prompts or warns you about something, smart copy for instance.

Avidemux-Enable-Smartcopy

Once the video is saved open it up in your favorite player and evaluate the havoc you’ve wrought upon it.

The video included in this post was datamoshed using this technique, however the audio was slowed down using traditional video editing.#corruptabsolutely

Update

For those of you unable to run Avidemux 2.5.6 on OSX you can try running Avidemux 2.5.4 on Yosemite and Lion thanks to some instructions from Way over at Glichet.

  • Go to the Avidemux 2.5.4 binary archive here
  • Download avidemux2_2.5.4_intel.dmg
  • Unpack it and then drag avidemux2 to your Applications folder
  • Navigate to the Applications folder, right-click (or control+click) on avidemux2, and click Show Package Contents
  • Delete libxml.2.dylib and libiconv.2.dylib from the Contents/Resources/lib folder. *libxml.2.dylib can also be named libxml2.2.dylib
  • Open avidemux2

Windows

OSX

How to glitch images with WordPad

Sometimes glitching images can be as easy as opening them and saving them again — and that’s exactly the case when image bending with Microsoft WordPad. WordPad is a basic word processor that is included with almost all versions of Microsoft Windows from Windows 95 onwards. If you are running Microsoft Windows then you’ve probably got WordPad on your system, and you can datamosh images with it.

If you don’t have the time or inclination to glitch images using WordPad you can use dedicated apps such as Glitch for iOS.

glitch4ios

To start glitching with WordPad we need to convert our source image to a BMP (Bitmap) file. This can be done with any image editing software, but since this tutorial is about WordPad we’re going to use one of its fellow Microsoft applications, Microsoft Paint, which is also included with most versions of Microsoft Windows. If you can’t find Paint, press the Win + R keys, type in “pbrush” and press Enter, Paint should open. Open your file and then choose Save as and BMP picture.

Paint-save-as

Then select 24-bit Bitmap (*.bmp;*.dib) from the Save as type dropdown, other types of BMP will work as well to varying degrees.

Paint-save-as-bitmap

Next we need to open the BMP in WordPad. If you can’t find WordPad, press the Win + R keys, type in “write” and press Enter, WordPad should open. Open your BMP image in WordPad by selecting All Documents(*.*) in the dropdown beside the File name field.

WordPad-open

Wait for WordPad to load the image as a document and then press Ctrl+S on your keyboard to Save or use the menu to Save the file.

That’s all there is to it. The process of opening and saving the image using WordPad invokes what has been dubbed the WordPad Effect. You can also try deleting some random text from the file before saving, but it’s not required to glitch the image. The splash image for this post was simply opened and then saved, the WordPad Effect did the rest.

WordPad-opened

So what’s going on here? For the curious, a cursory comparison of the before and after files seems to confirm my suspicion that the transformation, at least in some part, has to do with WordPad converting line breaks when it loads in the image. Line breaks are some bytes that tell text editors and word processors where they should break the text and continue on the next line.

Different operating systems handled them slightly differently, the bytes involved are what’s called a Line Feed, represented by 0x0A in hexadecimal, and a carriage return, 0x0D in hexadecimal. This nomenclature comes from mechanical typewriters where a line of physical paper is fed through the roller (line feed) and the carriage is returned to the beginning of the line (carriage return). In text editors the meaning is the same, a 0x0A tells the editor to move to the next line and a 0x0D tells the editor to move to the beginning of the line.

Image files don’t contain any line feeds or carriage returns, but since WordPad looks at the image data as if it were text it looks for 0x0D and 0x0A in the image file which mean something completely unrelated for images. WordPad attempts to clean up what it thinks is a text file by ensuring that all line breaks have a line feed and a carriage return, so when it finds 0x0D without an accompanying 0x0A, it adds one, and when it finds an 0x0A without an 0x0D it adds one there as well. Because 0x0A and 0x0D mean different things for images, when WordPad thinks it’s correcting a text file in actuality its corrupting the image — et voilà, the WordPad Effect. #corruptabsolutely

How to glitch images using Processing scripts

Datamoshing images, also known as databending or glitching images can be done in a number of ways, some of the most interesting glitches are accomplished by using the Processing programming language. From the beginning the Processing language, was designed as a first programming language. It was inspired by earlier languages like BASIC and Logo.

If you don’t have the time or inclination to glitch images using scripts you can use dedicated apps such as Glitch for iOS.

glitch4ios

To get started download and install the latest version of Processing, version 3.1.1 at the time of writing this. I’ve written a simple script you can download here, you’ll have to unzip it once it’s downloaded. Once you’ve installed and opened Processing you can load the script by accessing the menu.

File > Open

And navigating to the SimpleGlitch.pde script file. In the script, which are referred to as sketches in Processing, you’ll need to change the following lines to point the script at the image you want to pixel sort:

// image path is relative to sketch directory
PImage img;
String imgFileName = "MyImage";
String fileType = "jpg";

In the simple glitch sketch we’re doing a little more. For each pixel in the image the script generates some random numbers to determine whether or not to glitch that pixel. It also keeps track of whether or not the previous pixel was glitched by setting the previousPixelGlitched variable to true or false, if it was, there’s a higher chance that the code will glitch the current pixel. This type of structure will result in lines of glitched pixels, rather that just randomly positioned glitched pixels, which ends up looking like static.

The sketch generates a new random color for the randomColor variable before glitching any pixels and each time a pixel is not glitched. This means that each line of glitched pixels will have a new random color available to it.

// random color 
// 0-255, red, green, blue, alpha
color randomColor = color(random(255), random(255), random(255), 255);

The sketch generates another random number, this time between .5 and 1, and uses this as a mix ratio to mix the random color with the current pixel’s color.

// percentage to mix
float mixPercentage = .5 + random(50)/100;

// mix colors by random percentage of new random color
img.pixels[y + x * img.height] = lerpColor(pixelColor, randomColor, mixPercentage);

For the featured image of this post I adjusted the random color generator to always use 255 (the maximum) blue and thus the resulting image contains colors from the cool range of the spectrum.

In short, this script creates lines of random length and of random colors and mixes them into the original image. I also added some commented out lines that illustrate how to apply filters to the entire image in Processing, uncomment them to see how they affect the result.

// apply some filters
// https://processing.org/reference/filter_.html

// posterize filter
// filter(POSTERIZE, 4);

// dilate filter
// filter(DILATE);

Some ideas for experimenting with this script might be changing the mixPercentage randomness, or, as I did, adjust the random color to be less random by replacing any of the three random(255) with a number between 0 and 255. Instead of glitching pixels randomly you could use a counter, or geometric function (sin, cos, etc) in the loop to glitch pixels in mathematical patterns.

If you’re feeling intimidated by the simple glitch script I created a super simple glitch script you can download here. The super simple glitch script doesn’t actually do anything except loop through each pixel in the image, so it’s ready for experimentation. #corruptabsolutely

iOS (iPhone, iPad)

Windows

OSX

Processing

How to glitch images using pixel sorting

Pixel sorting is the process of isolating a horizontal or vertical line of pixels in an image and sorting their positions based on any number of criteria. For instance pixels positions may be sorted by each pixel’s luminosity, hue or saturation. Manual pixel sorting, while possible, would be overly time consuming, instead Pixel sorting is accomplished using scripting or programming languages.

If you don’t have the time or inclination to pixel sort images using scripts you can use dedicated apps such as Glitch for iOS.

glitch4ios

One popular programming language for pixel sorting is Processing. To get started download and install the latest version of Processing, version 3.1.1 at the time of writing this. Next select a pixel sorting script to start from, my own pixel sorting scripts are not written for Processing so for the purposes of this tutorial we’ll use a popular script made available by glitch artist Kim Asendorf, the ASDF Pixel Sort.

Download the ASDFPixelSort.pde from Kim’s GitHub repository by clicking the green button labelled Clone or download and select Download ZIP. If you’re familiar with GitHub you can do this a number of other ways. Once you’ve downloaded the ZIP you can extract the sorting script and open it in Processing by selecting:

File > Open

And navigating to the ASDFPixelSort.pde script file. In the script, which are referred to as sketches in Processing, you’ll need to change the following lines to point the script at the image you want to pixel sort:

// image path is relative to sketch directory
PImage img;
String imgFileName = "MyImage";
String fileType = "png";

For this tutorial we’ll use a PNG, though Processing supports GIF, JPG and TGA as well. Place your PNG in the same directory as the ASDFPixelSort.pde (which Processing may have placed in a new sub directory) and update the script with the filename.

Once you’ve updated the script with the name of your file simply press the Run button at the top left of the Processing window (it looks like a play button) and in a few seconds you should see a window with the results, a new image should also be saved to the sketch directory.

pixel-sort-run

This particular script loops through both the columns and the rows of the image, but it doesn’t pixel sort the entire column or row, if it did, the result would look more like a blank gradient than anything interesting. Instead for each column and row it looks for a pixel to start sorting on and then it looks for a pixel to stop sorting on — this makes the algorithm somewhat intelligent resulting in identifiable elements of the image being left untouched.

In order to decide which pixel to start sorting on and which to stop sorting on this script can operate in three different modes. The mode can be changed by adjusting the mode variable, by default it is set to 1, but can be changed to either 0 or 2 as well. Different modes will work better depending on the image itself.

 sorting modes
 
 0 = black
 1 = brightness
 2 = white
 
 */

In mode 0, or black mode, the script will begin sorting when it finds a pixel which is not black in the column or row, and will stop sorting when it finds a black pixel. The script identifies black pixels by comparing the pixel’s color value to a threshold, if it’s lower than the black threshold the pixel is deemed to not be black, if it’s higher it’s deemed to be black. You can adjust this threshold by changing the blackValue variable which is by default set to -16000000.

suit-0

In mode 1, or brightness mode, the script will begin sorting when it finds a pixel which is bright in the column or row, and will stop sorting when it finds a dark pixel. The script identifies black pixels by comparing the pixel’s brightness value to a threshold, if it’s lower than the brightness threshold the pixel is deemed to be dark, if it’s higher it’s deemed to be bright. You can adjust this threshold by changing the brightnessValue variable which is by default set to 60.

suit-0

In mode 2, or white mode, the script will begin sorting when it finds a pixel which is not white in the column or row, and will stop sorting when it finds a white pixel. The script identifies white pixels by comparing the pixel’s color value to a threshold, if it’s lower than the white threshold the pixel is deemed to not be white, if it’s higher it’s deemed to be white. You can adjust this threshold by changing the whiteValue variable which is by default set to -13000000.

suit-0

The script can also be run many times to apply the pixel sorting effect multiple times. This can be set by adjusting the loops variable which is by default set to 1.

int loops = 1;

// threshold values to determine sorting start and end pixels
int blackValue = -16000000;
int brightnessValue = 60;
int whiteValue = -13000000;

Pixel sorting is a powerful, and fun, concept. Start by trying out different modes and adjusting the various threshold values. From there you can try moving the row sorting above the column sorting, this will result in more visible vertical sorting (similar to the featured image of this post) as whichever sort is performed last will have the greatest impact on the final image. Alternately you can rotate your image in image editing software before pixel sorting it and then rotate it back to accomplish a similar result. If you break the script, just download the original and get back to experimenting.

  // loop through columns
  while(column < width-1) {
    println("Sorting Column " + column);
    img.loadPixels(); 
    sortColumn();
    column++;
    img.updatePixels();
  }
  
  // loop through rows
  while(row < height-1) {
    println("Sorting Row " + column);
    img.loadPixels(); 
    sortRow();
    row++;
    img.updatePixels();
  }

Some scripts haven’t been updated in a while. If the script you are trying to use is having errors (that don’t seem to do with not finding your image) right from the get-go you might want to try an early version of Processing, versions 2.2.1 and 1.5.1 are listed towards the bottom of the download page.

For more advanced pixel sorting scripts you can have a look at Jeff Thompson’s GitHub which has a number of examples. At the time of writing this I was experiencing errors running them though — they may need updating to function correctly, or at all. If you’ve got the hang of Processing than there’s no reason why you can’t craft an entirely original script. There are two main concepts to explore here, the first is how to determine which pixels to sort, and the second is how to sort them. I’ve had success experimenting with hue based sorting, as well as combining pixel sorting with Sobel edge detection algorithms. #corruptabsolutely

iOS (iPhone, iPad)

Windows

OSX

Processing

How to glitch JPG images with data corruption

Glitching JPG (or JPEG) images by corrupting their data is a relatively straight-forward affair. Simply open up the file in a hex editor and wreck up the place. Corrupted JPG images can be identified by the telltale offset horizontal bands of changing hues and small square sequences of artifact patterns at the beginning or end of these bands.

If you don’t have the time or inclination to manually glitch JPG images you can use dedicated apps such as Glitch for iOS.

glitch4ios

If you don’t have a hex editor installed there are some freeware options list at the bottom of this post. Hex editors allow us to view and edit the bytes of a file using hexadecimal. Editing the file using hex rather than text allows greater flexibility since we’re no longer restricted to text characters (which are each represented by two hex digits). Most hex editors display both hex and text (also known as ASCII) in the same view but in separate columns. You can see a JPG open in a hex editor in the image below.

hex-exif

Get started by making a copy of a JPG and open the copy in a hex editor — never edit the original file. The first bytes of a JPG file contain what’s know as the file header. The header contains information that is required for the image to be displayed at all and should be left intact (though feel free to experiment). We need to locate the meat of the file, the raw image data, we can usually tell the raw data apart from the header and other important structural data by it’s garbled nature.

hex-jpg

We can see where some data ripe for glitching is in the above example where the file changes from structured, to seemingly random data. Not to say that there’s no structure, it’s just harder to discern in compressed image data. Once we’ve identified the raw image data we can copy/paste chunks, search/replace sequences or just manually corrupt the data by changing the text (on the right side in the example) or the hex (on the left side in the example) of the raw data.

Now we can begin the process of making changes and checking the result in our favorite image viewer. Making backup copies after every successful change will avoid heartaches when, not if, a misstep renders the image unviewable.

artifacts

Corrupting JPG images often results in interesting patterns due to the corrupt data and the compression algorithms used, as seen enlarged in the example above. Decreasing the quality of the JPG itself, which can be done with image editing software, can sometimes increase the likelihood of generating these artifacts through corruption.

This method can also be used to glitch some other formats as well, most notably BMP files.

As with any glitch-by-corruption technique, too little has no effect, too much can destroy the file, but just enough results in glorious, glorious corruption. #corruptabsolutely

iOS (iPhone, iPad)

Windows Phone

Windows

OSX