Datamoshing videos can be a time-consuming process, automation can help. For Windows users AutoHotkey is free, open-source macro-creation and automation software that can handle some of the repetitive tasks involved in datamoshing.
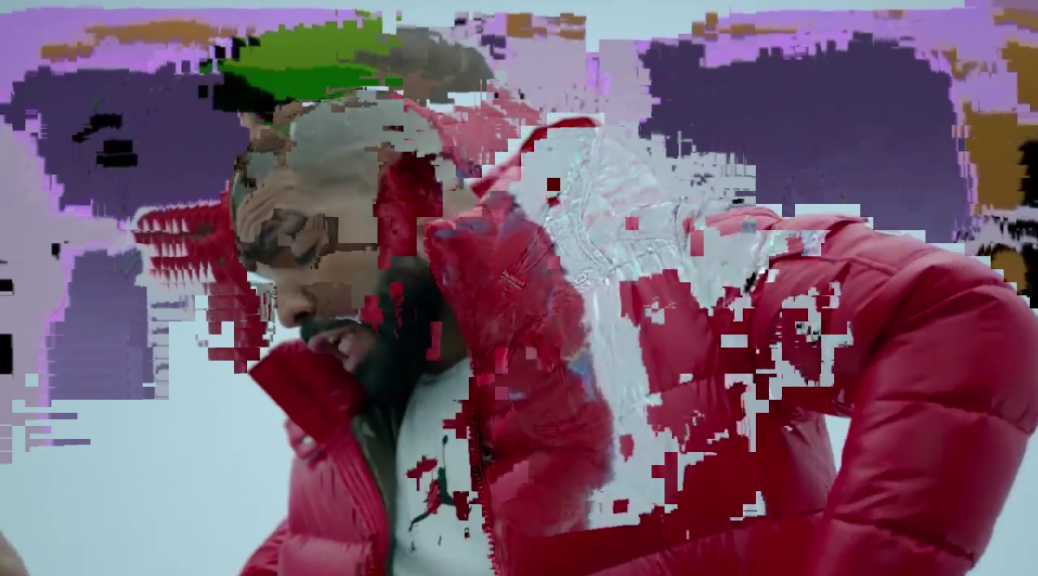
The following script for AutoHotkey automates I-frame removal in Avidemux, normally a manual process described in this tutorial. The video above was datamoshed using this automation script.
Load AutoHotkey with the script below and then when it comes time to best watch replica for sale remove I-frames in Avidemux simply focus the slider below the video and press Control+F to trigger the AutoHotkey script. The script will send the appropriate key strokes to remove the next 10 I-frames while you pop out for a break.
These types of scripts could also be used to automate key strokes while hex editing images, consider a script which would move a certain number of characters across and then insert a character — that could glitch out an image quite nicely. Similarly one could experiment with automating photo editing processes by scripting with a program like AutoHotkey.
Some of these types of automation could be accomplished through the usage of a programming framework, or scripting language, but automating at the user interface level can remove a lot of overhead and restrictions.
Datamoshing is the process of manipulating the data of media files in order to achieve visual or auditory effects when the file is decoded. In some cases the term datamoshing is used perfect Replica Watches best quality to describe this process applied to any type of media file — I like to think it applies solely to video since it results in moving images being moshed together. Regardless of the application of the term, datamoshing videos can be done quite easily with free, cross-platform tools.
Modern compressed video files have very complex methods of reducing the amount of storage or bandwidth needed to display the video. To do this most formats don’t store the entire image for each frame.
Frames which store an entire picture are called I-frames (Intra-coded), and can be displayed without any additional information.
Frames which don’t contain the entire picture require information from other frames in order to be displayed, either previous or subsequent frames, these frames are called P-frames (Predicted) and B-frames (Bi-predictive). Instead of storing full pictures these P-frames and B-frames contain data describing only the differences in the picture from the preceding frame, and/or from the next frame, this data is much smaller compared to storing the entire picture — especially in videos where there isn’t much movement.
When a video is encoded, or compressed, a combination of these types of frames are used. In most cases this means many P-frames with I-frames interspersed at regular intervals and where drastic visual changes in the video occur. More information on frame types can be found here.
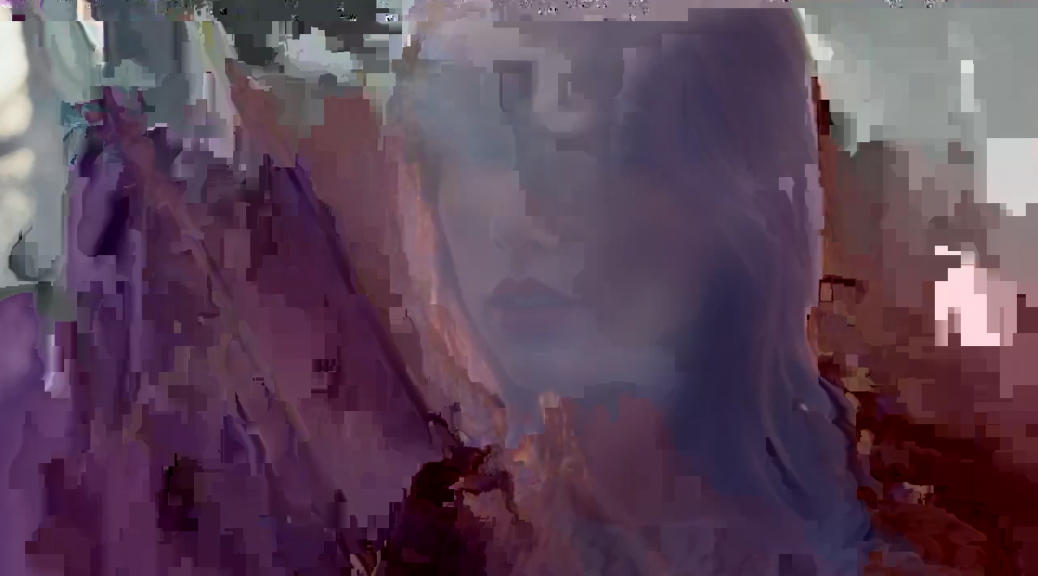
If an I-frame is corrupted, removed or replaced the data contained in the following P-frames is applied to the wrong picture. In the above video I-frames have been removed and so instead of scenes changing properly you see the motion from a new scene applied to a picture from a previous frame. This process of corrupting, removing or replacing I-frames is a very popular video datamoshing technique and what this tutorial will focus on.
Another video datamoshing technique involves selecting one or more P-frames and duplicating them multiple times consecutively. This results in the same P-frame data being applied to one picture over and over again, accentuating the movement and creating what’s known as a Bloom effect.
For this tutorial we’ll be using Avidemux, a free, cross platform video editing application. Generally the effects of datamoshing are viewed as errors, or undesirable and thus applications like Avidemux try their best to correct these errors and eliminate glitching distortion. For this reason the latest version of Avidemux isn’t very good for datamoshing, but some older versions, such as 2.5.6, available here, work just fine.
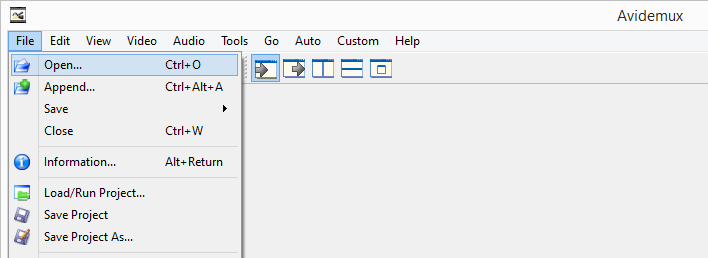
After downloading and installing Avidemux 2.5.6 Open the video you want to mosh.
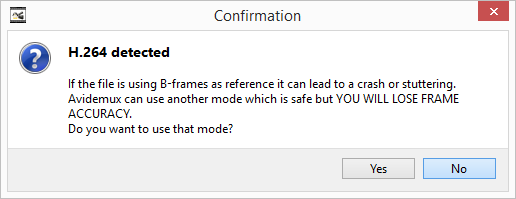
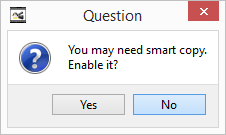
Avidemux may show warnings depending on the type of file you’re using, select No and continue.
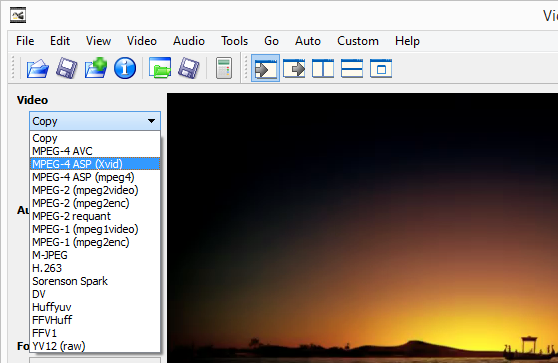
Once the video is loaded we’ll be making a small change to allow us to remove I-frames and still have a playable video. Under Video on the left side of the interface use the dropdown to change the selection from Copy to MPEG-4 ASP (Xvid).
Next click the Configure button below the Video dropdown on the left. Select the Frame tab and then change the Maximum I-frame Interval from 300 to 99999999 then click OK. By changing this setting we’re allowing the video file to be played back even if it has unusually few I-frames, one every 99999999 frames.
With this setting changed the video must be saved and then reloaded for it to take effect. Save the video with a new name to indicate that the Maximum I-frame Interval has been adjusted.
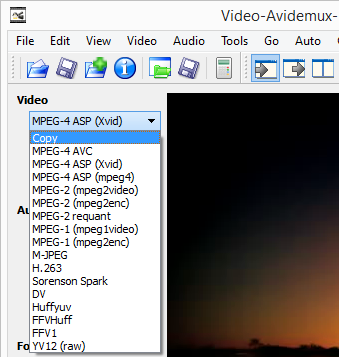
Open the new video, select No if Avidemux displays any warnings. Once opened, change the Video dropdown on the left side of the interface back to Copy. We won’t be changing the encoding or any settings of the video at this point, we’re just going to remove I-frames and then Save it.
To remove I-frames we use the slider at the bottom of the interface, it displays the current frame type below the video navigation buttons, you’ll mostly see Frame Type: I (00) and Frame Type: P (00). The first frame will most likely be an I-frame and should be left in so that the video can start properly. To locate other I-frames click on the slider tab/grip to focus the slider then press the Up Arrow on your keyboard to jump to the next I-frame, the Down Arrow will jump to the previous I-frame.
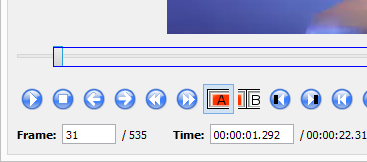
In order to remove an I-frame we must select it, this is done by marking an in point and an out point, these points are referred to as A and B in Avidemux and the frames of video between these two points are considered selected. Once you have found an I-frame click on the mark A button under the slider. You should see a blue border identify the new selection, starting at the slider grip and encompassing the remaining frames in the video.
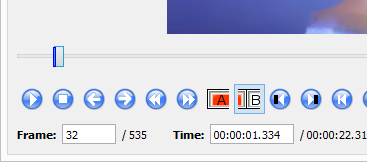
Pressing delete now would delete the current I-frame and all subsequent frames so we have to reduce the selection to only the I-frame. This is done be pressing the Right Arrow key to move to the next frame and then clicking the mark B button below the slider. The blue selection border should update to show only the I-frame selected as illustrated below.
Now that only a single I-frame is selected press the Delete key on your keyboard to remove it. To remove all the I-frames use the Up Arrow to move to the next one and repeat the removal process. Try to avoid moving backwards through the video once you’ve removed I-frames as this can cause Avidemux to crash, stick to moving forward through the I-frames and removing them.
After you’ve removed one or more I-frames, Save the video and again select No if Avidemux prompts or warns you about something, smart copy for instance.
Once the video is saved open it up in your favorite player and evaluate the havoc you’ve wrought upon it.
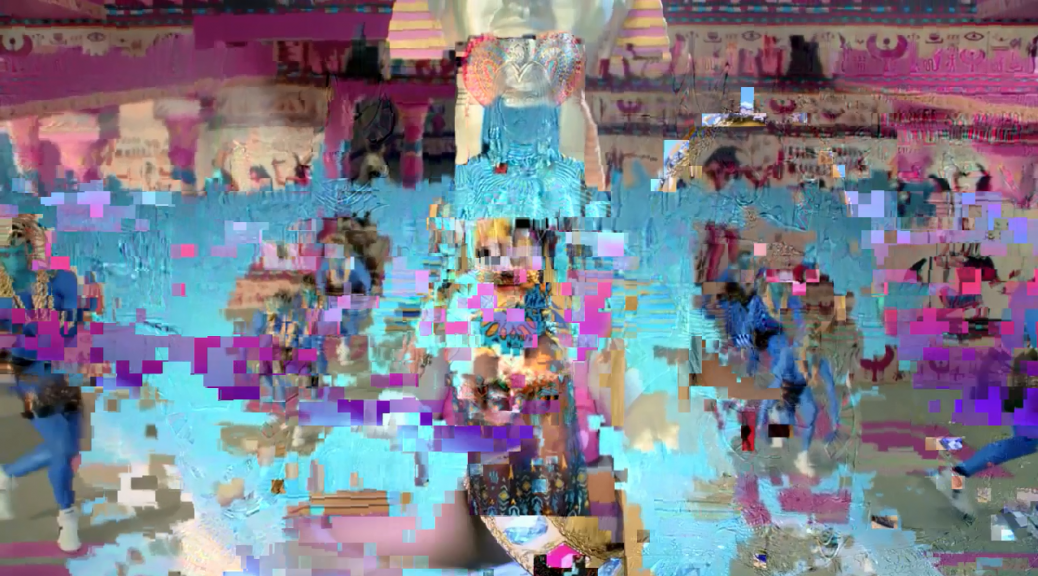
The video included in this post was datamoshed using this technique, however the audio was slowed down using traditional video editing.#corruptabsolutely
Update
For those of you unable to run Avidemux 2.5.6 on OSX you can try running Avidemux 2.5.4 on Yosemite and Lion thanks to some instructions from Way over at Glichet.
Glitching videos with data corruption can be a tricky process. This is owing to the fact that video formats are substantially more complex than image formats. Since video formats contain audio and timing information in addition to visual information corrupting the wrong section of a video file can quickly render the file unplayable rather than delightfully distorted.
This tutorial will focus on glitching the popular MP4 and MOV formats containing video compressed with the H.264 standard. If the video you want to destroy is not in MP4 or MOV format already an easy way to convert it is to upload it to YouTube, let them convert it, and then download the result. If a video doesn’t set off any copyright claims you can download it from the YouTube Video Manager in MP4 format.
Get started by making a copy of your MOV or MP4 and open the copy in a hex editor — never edit the original file. If you don’t have a hex editor installed there are some freeware options listed at the bottom of this post. Hex editors allow us to view and edit the bytes of a file using hexadecimal. Editing the file using hex rather than text allows greater flexibility since we’re no longer restricted to text characters (which are each represented by two hex digits).
We know that we’re looking at an MP4 or MOV file when we see the text ftypqt starting on the fifth byte of the file as illustrated in the example below.
The MP4 and MOV (Quicktime) formats utilize a similar structure, the file is broken down into atoms or blocks of data. The atom which contains the raw frame and audio data can be identified by it’s atom type string, which in this case is mdat (short for media data).
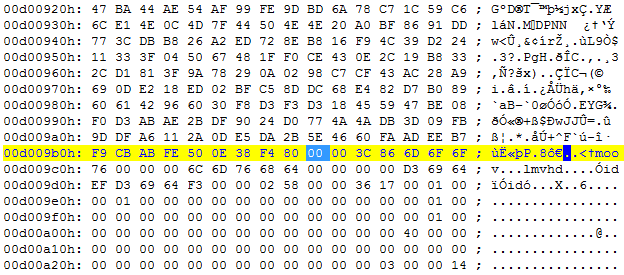
The data contained within the mdat atom is comprised of chunks, which are comprised of nal units, which are comprised of slices. For the purposes of this tutorial we won’t delve that deep. Finding the mdat atom can be done by searching the file for the string “mdat” as seen in the above image. Notice that the contents of the mdat atom seem quite random when viewed in a hex editor, in contrast the contents of the other atoms in MP4 and MOV files are very structured. With this information we can easily find the end of the mdat atom by scrolling through it (or up from the bottom of the file) to see where the data starts to look random as illustrated in the image below.
Here we can see that the mdat atom is followed by the moov atom (and an mvhd atom after that), this is not always the case as the order of the atoms can be different. What’s important to note though is that the file is visibly more structured after the mdat atom, this is how we can identify where the mdat atom ends. The mdat atom, in all cases, will either continue to the end of the file or it will be followed by another atom identified by a 4-character string such as the moov atom does in the above example. Using this method we can identify both the start and the end of the mdat atom, and in turn where we can corrupt only the mdat atom’s contents and have a fair chance of the video still being playable.
Once we’ve identified the boundaries of mdat atom we can begin to copy and paste, replace or edit portions of the raw hex data (or the text ASCII data, either will work) of the video and check the result along the way by attempting to play the video. Making backup copies after every successful change will avoid heartaches when, not if, a misstep renders the video unplayable.
Some notes on successful corrupting:
It doesn’t take much corruption to add bizarre distortion to a video, even corrupting as little as 10% of a file, a couple of bytes here and there, has the potential to send playback into a wild frenzy.
While not required, most data in the mdat will be in sequence so if we want to corrupt a specific portion of the video we can estimate the offset of the data for that portion is in the mdat based on its time.
The mdat atom will also contain raw audio data so if the audio becomes distorted during playback we know we’ve gone too far, or started too early, in the mdat atom.
Copying and pasting hex within nal units is probably the best way to corrupt H.264 video data as you’ll be shuffling valid data around rather than adding outright gibberish.
As mentioned previously the mdat is comprised of chunks, as chunks and the nal units contained within them have structure it’s best to corrupt small portions of data in various spots rather than large swaths. Corrupting large regions of data will inevitably cross over structure boundaries and destroy important information regarding the type of nal unit or slice.
To stay inside nal units look for hex 67, 68 or 00 00 01 as these sequences can denote the beginning of a new nal unit.
This definitely falls under the bull in a china shop category of datamoshing video so don’t be discouraged if it takes a couple of restarts to get a playable result.
The video included in this post was glitched using this technique, however the audio was slowed down using traditional video editing.
As with any glitch-by-corruption technique, it requires a soft touch — too little has no effect, too much can destroy the file, but just enough results in glorious, glorious corruption. #corruptabsolutely