Images can be pleasantly destroyed in a great number of ways, some of the best results come from applying transformation algorithms to the raw image data. Applying filter algorithms to images is something one would normally use software like Adobe Photoshop for, however, using audio processing software instead can yield much more interesting, and unexpected, results.
If you don’t have the time or inclination to manually glitch images with audio processing software you can use dedicated apps such as Glitch for iOS.


Firstly we’ll need some audio processing software, many will work, Audacity is free, supports many platforms and works quite well for glitching images. Secondly we’ll need a databending-friendly image, the BMP format works well for this type of bending. Once we have an image and Audacity installed, open Audacity and import the image by selecting:
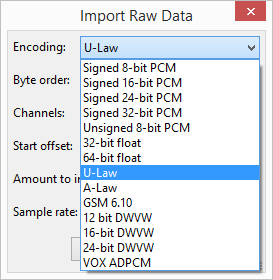
File > Import > Raw Data

Audacity will then ask for some information about the file we are importing, we’re going to lie, for Encoding select either U-Law or A-Law. We will have to export with the same encoding setting so remember which was selected. Defaults will work fine for the rest of the import options.
The image will now be open as an audio file, I don’t suggest pressing play. Now we can select any portion of the file or its entirety by clicking and dragging on the waveform (the chart-like display). In some cases it’s better avoid selecting the beginning (first 5-10 seconds of the waveform) of the file as this contains the file header, a section of the file which contains information needed to display the image, if the image won’t display after exporting consider leaving the header intact.
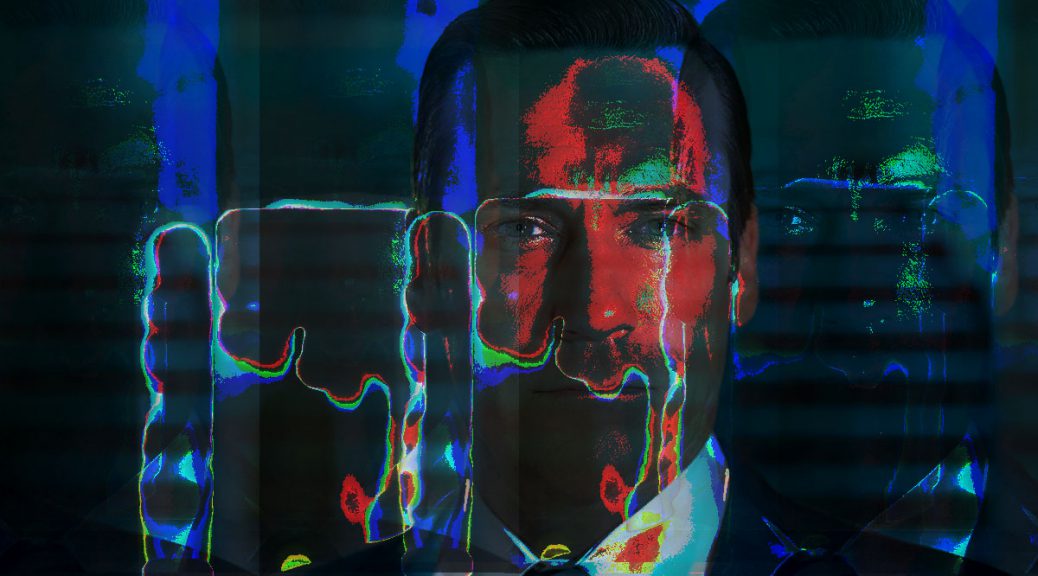
Once we have a selection, we can apply any of the filters under the Effects menu. I have found the Invert, Reverb, Reverse, Wahwah, Compressor and Echo work quite well, but here is where you can experiment. You’ll see the waveform change as each filter effect is applied. The hero image of this post was created using the Compressor and Echo filters applied to the entire file.
Once we’ve applied one or more filter effects we can export the data back to an image by selecting:
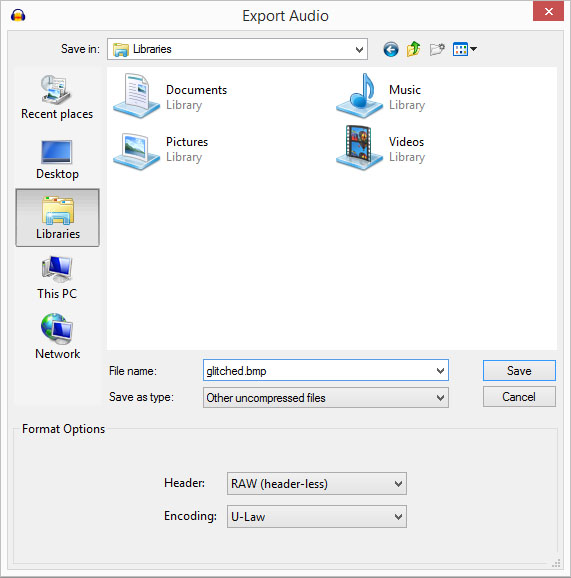
File > Export Audio
Change the filename back to the proper image extension, in this case BMP. The Save as type should be set to Other uncompressed files, the Header should be set to RAW (header-less) and the Encoding should be set to either U-Law or A-Law depending on which was chosen during the import process.
Audacity may complain that not all is well with the filename, and perhaps prompt for metadata but these prompts can be accepted and ignored.
All that’s left is to check the result — in an image viewer, not a music player. #corruptabsolutely
Sweet, thanks for sharing this method!
The results are amazing!
I’be been following every step cautiously, but i can’t read the file at the end ! This is frustrating haha
In many cases glitching is not an exact science, especially this type of cross-file type operation. Try a different image, different size of image, different audio filters and perhaps a different image viewer — a forgiving viewer might display images with more errors than others.
I pressed play. It turns out that John William Waterhouse kinda sounds like Witch House, especially if you slow it down a little. I’m happy with that. Thanks for the tutorial.
Any suggestions on how to switch to bmp on mac?
you can export your image, and then if you press the alt key and format at the same time you get more options, including ‘microsoft bmp’ 🙂 there’s also converters etc online
Open the image in photoshop and go to Save as.. and select the format as BMP from the drop down, click Save and voila!
Get windows
my mac seems like not opening the images after i do the whole process, tried to opening it in photoshop too. says that the file is unreadable or damaged. How can i do it?