Datamoshing images, also known as databending or glitching images can be done in a number of ways, some of the most interesting glitches are accomplished by using the Processing programming language. From the beginning the Processing language, was designed as a first programming language. It was inspired by earlier languages like BASIC and Logo.
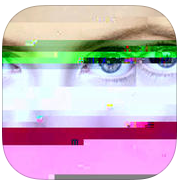
If you don’t have the time or inclination to glitch images using scripts you can use dedicated apps such as Glitch for iOS.

To get started download and install the latest version of Processing, version 3.1.1 at the time of writing this. I’ve written a simple script you can download here, you’ll have to unzip it once it’s downloaded. Once you’ve installed and opened Processing you can load the script by accessing the menu.
File > Open
And navigating to the SimpleGlitch.pde script file. In the script, which are referred to as sketches in Processing, you’ll need to change the following lines to point the script at the image you want to pixel sort:
// image path is relative to sketch directory
PImage img;
String imgFileName = "MyImage";
String fileType = "jpg";
In the simple glitch sketch we’re doing a little more. For each pixel in the image the script generates some random numbers to determine whether or not to glitch that pixel. It also keeps track of whether or not the previous pixel was glitched by setting the previousPixelGlitched variable to true or false, if it was, there’s a higher chance that the code will glitch the current pixel. This type of structure will result in lines of glitched pixels, rather that just randomly positioned glitched pixels, which ends up looking like static.
The sketch generates a new random color for the randomColor variable before glitching any pixels and each time a pixel is not glitched. This means that each line of glitched pixels will have a new random color available to it.
// random color
// 0-255, red, green, blue, alpha
color randomColor = color(random(255), random(255), random(255), 255);
The sketch generates another random number, this time between .5 and 1, and uses this as a mix ratio to mix the random color with the current pixel’s color.
// percentage to mix
float mixPercentage = .5 + random(50)/100;

// mix colors by random percentage of new random color
img.pixels[y + x * img.height] = lerpColor(pixelColor, randomColor, mixPercentage);
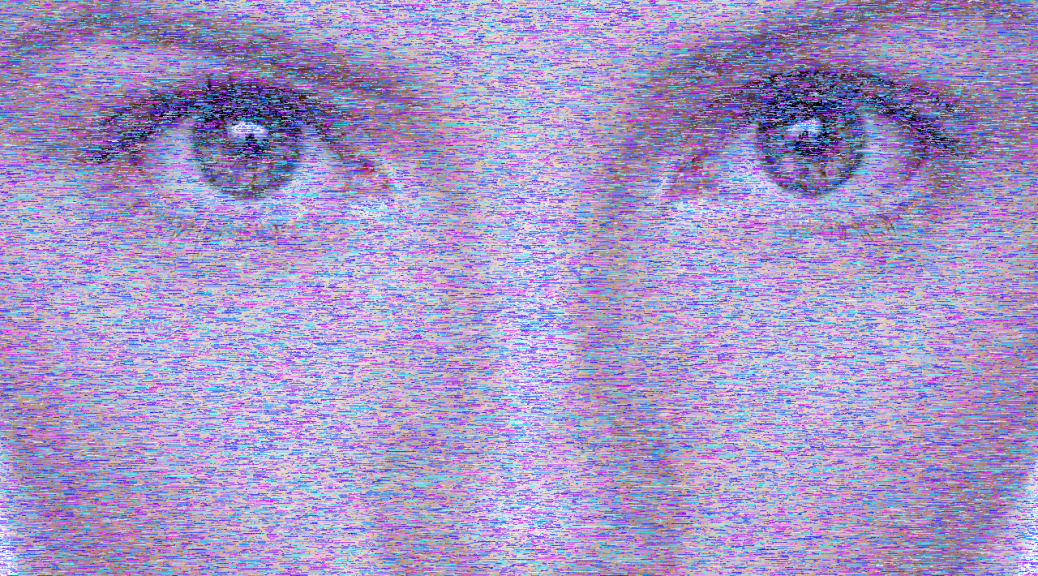
For the featured image of this post I adjusted the random color generator to always use 255 (the maximum) blue and thus the resulting image contains colors from the cool range of the spectrum.
In short, this script creates lines of random length and of random colors and mixes them into the original image. I also added some commented out lines that illustrate how to apply filters to the entire image in Processing, uncomment them to see how they affect the result.
// apply some filters
// https://processing.org/reference/filter_.html

// posterize filter
// filter(POSTERIZE, 4);

// dilate filter
// filter(DILATE);
Some ideas for experimenting with this script might be changing the mixPercentage randomness, or, as I did, adjust the random color to be less random by replacing any of the three random(255) with a number between 0 and 255. Instead of glitching pixels randomly you could use a counter, or geometric function (sin, cos, etc) in the loop to glitch pixels in mathematical patterns.
If you’re feeling intimidated by the simple glitch script I created a super simple glitch script you can download here. The super simple glitch script doesn’t actually do anything except loop through each pixel in the image, so it’s ready for experimentation. #corruptabsolutely
iOS (iPhone, iPad)
Windows
OSX
Processing
It doesn’t work
What is the issue that you are having with the script?
I can’t seem to put the image into the script. 🙁
Make sure the image is in the directory of the script and that you update the name and file type properties in the script,
String imgFileName = “MyImage”;
String fileType = “jpg”;
Hey!
With me the glitch is working but dunno why the image comes out cropped, and I’m able to see just the top of it all glitched. Do you have any advices on this? I was trying to modify the image size, but couldn’t guess which part of the script I have to adjust.
I believe this script, or method in Processing of rendering the image, is restricted to your current desktop resolution. Larger images will be cropped. When I get a chance I will see if there’s another more suitable method for rendering the images.
I have updated the script to work with any image size. Tested with Processing 3.0.
Thanks for this good and more effective post. i have more benefited from this idea.
Hey there,
Just wondering, the filter effects don’t seem to be saving along with the rest of the image. Any advice?
Make sure you’re using Simple Glitch and not Super Simply Glitch, which is a template which doesn’t do any glitching.
Sweet!! just what i was looking for:)
Great site!
Hey, so Processing doesn’t seem to correctly put the image in the script. Here is what I have:
// image path is relative to sketch directory
PImage img;
String imgFileName = “GlitchTest”;
String fileType = “jpg”;
The error that I am getting is:
The file “GlitchTest.jpg” is missing or inaccessible, make sure the URL is valid or that the file has been added to your sketch and is readable.
The image is in the same directory as the script. What am I doing wrong?
Thanks!
In some cases the script will make a subdirectory called “data”, you can try putting the image in that subdirectory or create it if it’s not there.
I’m also receiving the message “The file “MyImage.jpg” is missing or inaccessible, make sure the URL is valid or that the file has been added to your sketch and is readable.”
I verified the image is named correctly, and I made a copy which was placed in a subdirectory named ‘data’.
Line 20 gets highlighted and a message shows:
“size() cannot be used here”, and links to ‘size’ reference on processing.org
What version of Processing are you attempting to run the sketch in and what platform?
Processing 3.3.5
Mac OSX 10.11.6