Tag Archives: art

How to datamosh videos with data corruption


Glitching videos with data corruption can be a tricky process. This is owing to the fact that video formats are substantially more complex than image formats. Since video formats contain audio and timing information in addition to visual information corrupting the wrong section of a video file can quickly render the file unplayable rather than delightfully distorted.

This tutorial will focus on glitching the popular MP4 and MOV formats containing video compressed with the H.264 standard. If the video you want to destroy is not in MP4 or MOV format already an easy way to convert it is to upload it to YouTube, let them convert it, and then download the result. If a video doesn’t set off any copyright claims you can download it from the YouTube Video Manager in MP4 format.

Get started by making a copy of your MOV or MP4 and open the copy in a hex editor — never edit the original file. If you don’t have a hex editor installed there are some freeware options listed at the bottom of this post. Hex editors allow us to view and edit the bytes of a file using hexadecimal. Editing the file using hex rather than text allows greater flexibility since we’re no longer restricted to text characters (which are each represented by two hex digits).

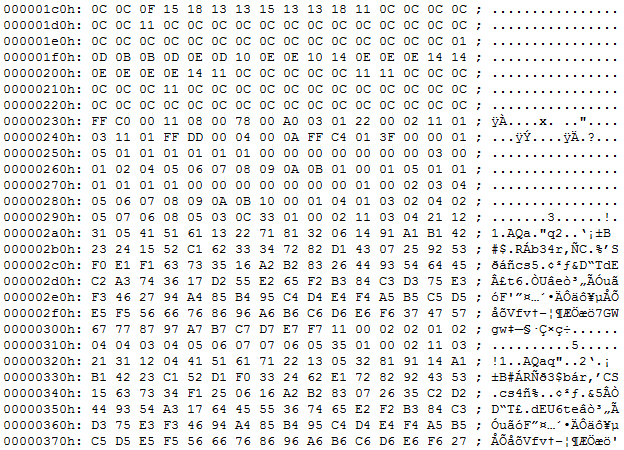
We know that we’re looking at an MP4 or MOV file when we see the text ftypqt starting on the fifth byte of the file as illustrated in the example below.

hex-ftypqt

The MP4 and MOV (Quicktime) formats utilize a similar structure, the file is broken down into atoms or blocks of data. The atom which contains the raw frame and audio data can be identified by it’s atom type string, which in this case is mdat (short for media data).

mov mp4 hex mdat

The data contained within the mdat atom is comprised of chunks, which are comprised of nal units, which are comprised of slices. For the purposes of this tutorial we won’t delve that deep. Finding the mdat atom can be done by searching the file for the string “mdat” as seen in the above image. Notice that the contents of the mdat atom seem quite random when viewed in a hex editor, in contrast the contents of the other atoms in MP4 and MOV files are very structured. With this information we can easily find the end of the mdat atom by scrolling through it (or up from the bottom of the file) to see where the data starts to look random as illustrated in the image below.

hex-moov

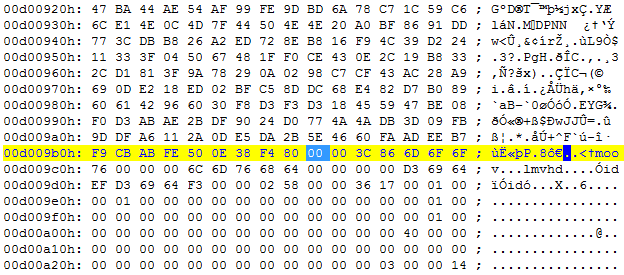
Here we can see that the mdat atom is followed by the moov atom (and an mvhd atom after that), this is not always the case as the order of the atoms can be different. What’s important to note though is that the file is visibly more structured after the mdat atom, this is how we can identify where the mdat atom ends. The mdat atom, in all cases, will either continue to the end of the file or it will be followed by another atom identified by a 4-character string such as the moov atom does in the above example. Using this method we can identify both the start and the end of the mdat atom, and in turn where we can corrupt only the mdat atom’s contents and have a fair chance of the video still being playable.

Once we’ve identified the boundaries of mdat atom we can begin to copy and paste, replace or edit portions of the raw hex data (or the text ASCII data, either will work) of the video and check the result along the way by attempting to play the video. Making backup copies after every successful change will avoid heartaches when, not if, a misstep renders the video unplayable.

Some notes on successful corrupting:

  • It doesn’t take much corruption to add bizarre distortion to a video, even corrupting as little as 10% of a file, a couple of bytes here and there, has the potential to send playback into a wild frenzy.
  • While not required, most data in the mdat will be in sequence so if we want to corrupt a specific portion of the video we can estimate the offset of the data for that portion is in the mdat based on its time.
  • The mdat atom will also contain raw audio data so if the audio becomes distorted during playback we know we’ve gone too far, or started too early, in the mdat atom.
  • Copying and pasting hex within nal units is probably the best way to corrupt H.264 video data as you’ll be shuffling valid data around rather than adding outright gibberish.
  • As mentioned previously the mdat is comprised of chunks, as chunks and the nal units contained within them have structure it’s best to corrupt small portions of data in various spots rather than large swaths. Corrupting large regions of data will inevitably cross over structure boundaries and destroy important information regarding the type of nal unit or slice.
  • To stay inside nal units look for hex 67, 68 or 00 00 01 as these sequences can denote the beginning of a new nal unit.
  • This definitely falls under the bull in a china shop category of datamoshing video so don’t be discouraged if it takes a couple of restarts to get a playable result.

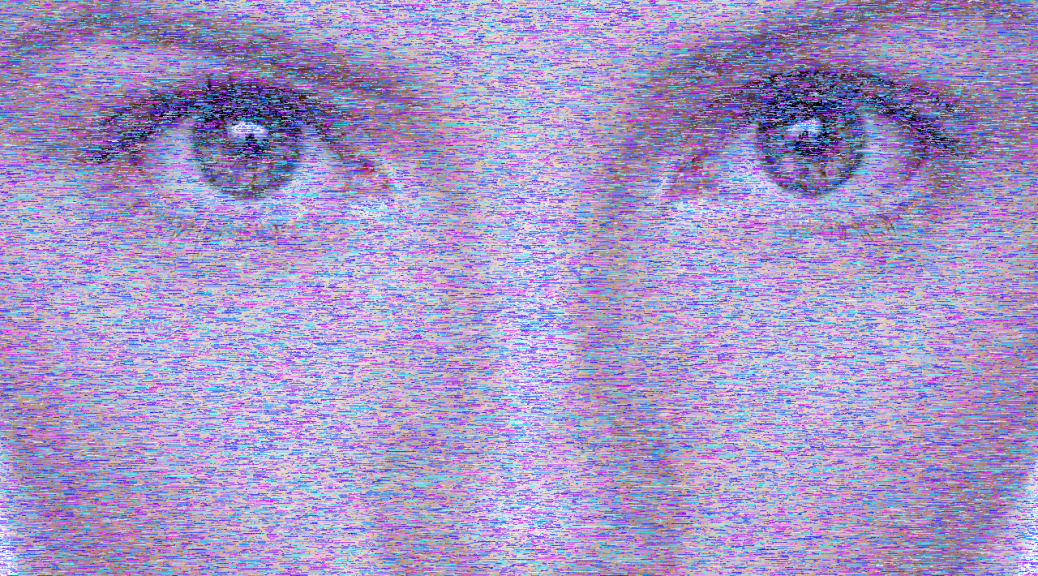
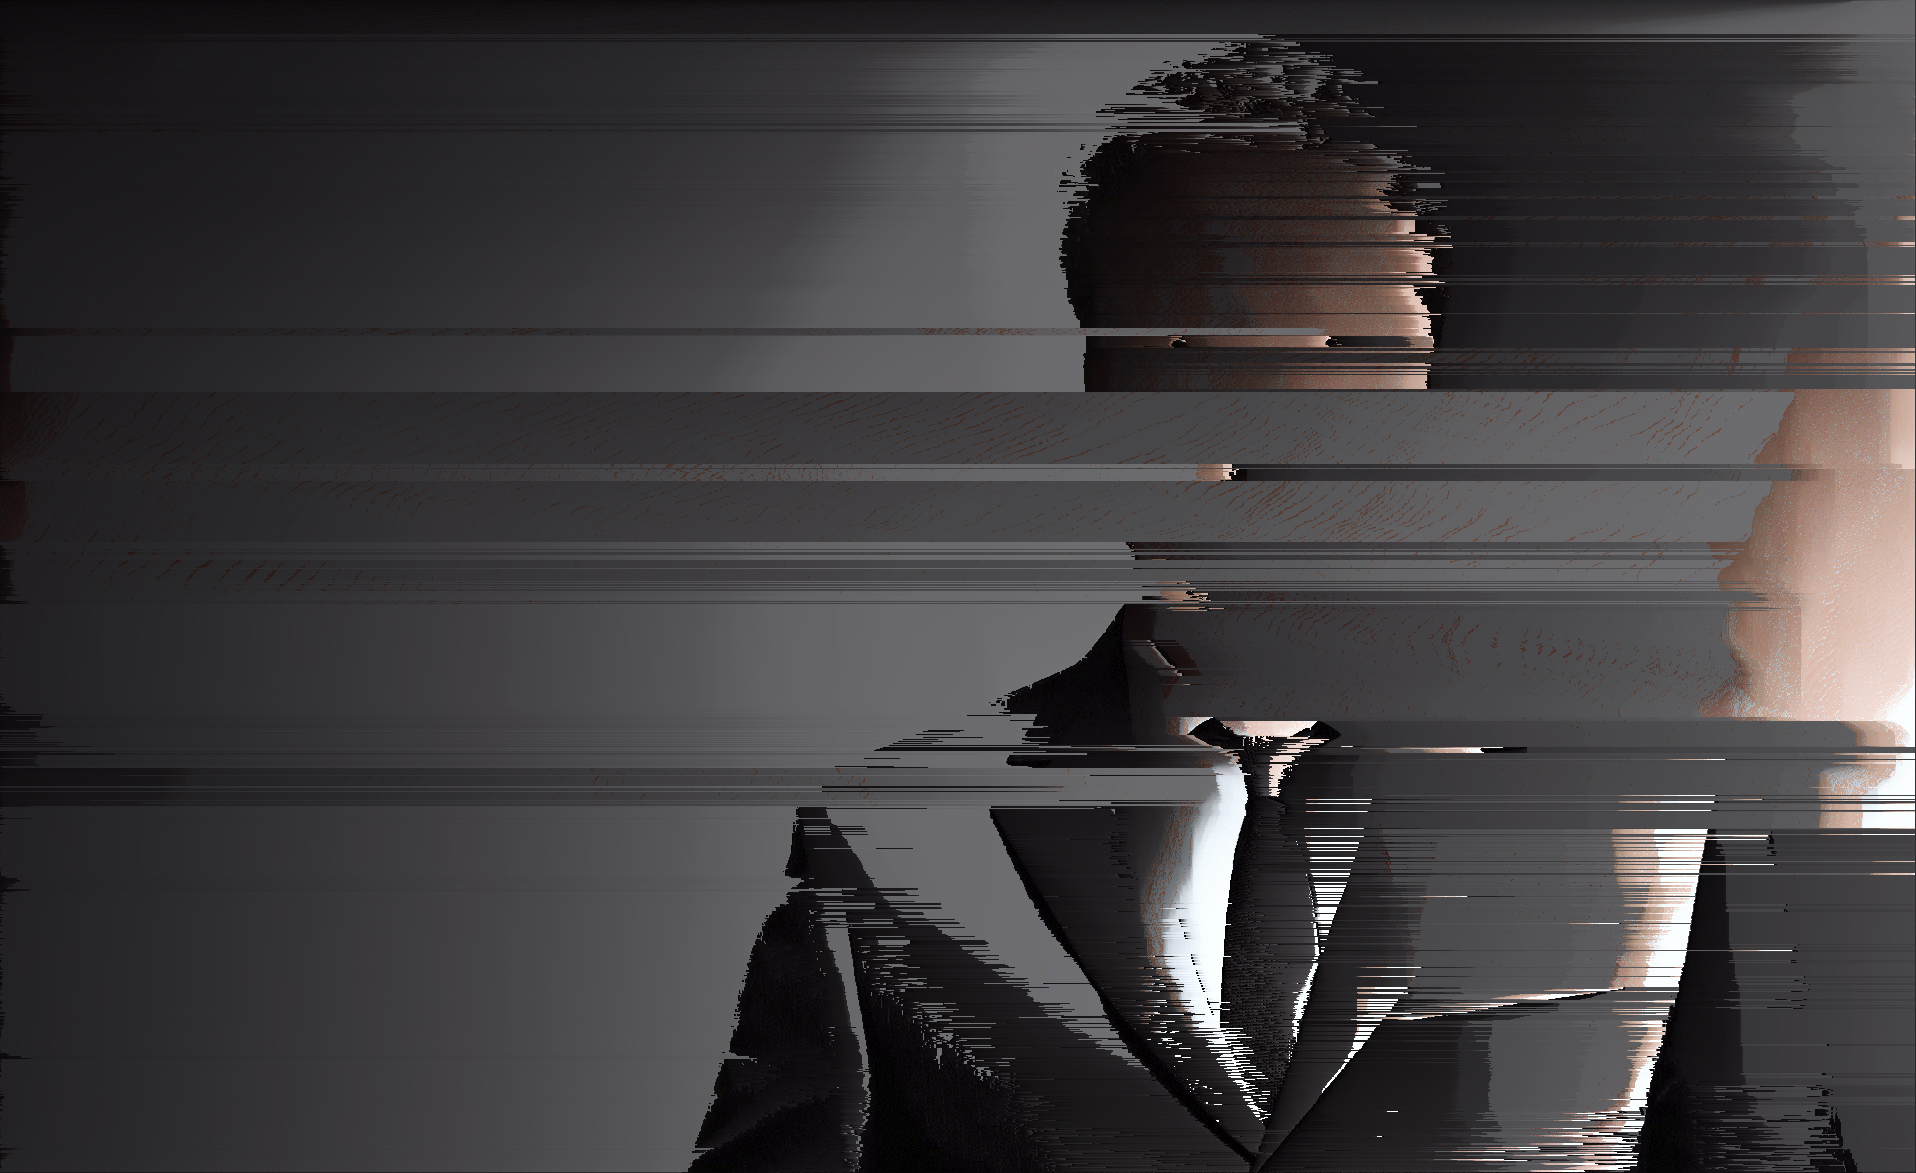
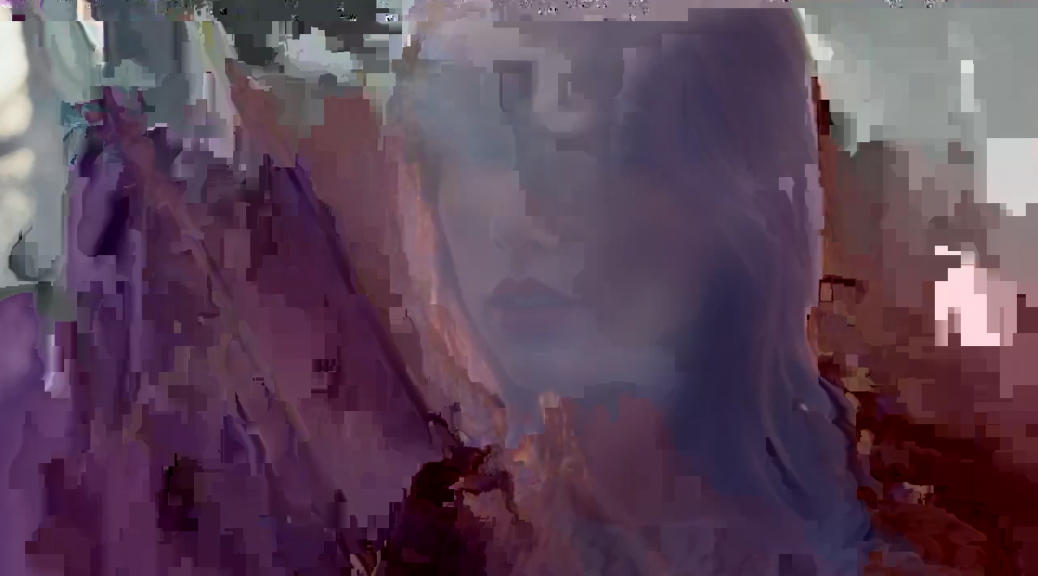
The video included in this post was glitched using this technique, however the audio was slowed down using traditional video editing.

As with any glitch-by-corruption technique, it requires a soft touch — too little has no effect, too much can destroy the file, but just enough results in glorious, glorious corruption. #corruptabsolutely

Windows

OSX

How to glitch images using Processing scripts

Datamoshing images, also known as databending or glitching images can be done in a number of ways, some of the most interesting glitches are accomplished by using the Processing programming language. From the beginning the Processing language, was designed as a first programming language. It was inspired by earlier languages like BASIC and Logo.

If you don’t have the time or inclination to glitch images using scripts you can use dedicated apps such as Glitch for iOS.

glitch4ios

To get started download and install the latest version of Processing, version 3.1.1 at the time of writing this. I’ve written a simple script you can download here, you’ll have to unzip it once it’s downloaded. Once you’ve installed and opened Processing you can load the script by accessing the menu.

File > Open

And navigating to the SimpleGlitch.pde script file. In the script, which are referred to as sketches in Processing, you’ll need to change the following lines to point the script at the image you want to pixel sort:

// image path is relative to sketch directory
PImage img;
String imgFileName = "MyImage";
String fileType = "jpg";

In the simple glitch sketch we’re doing a little more. For each pixel in the image the script generates some random numbers to determine whether or not to glitch that pixel. It also keeps track of whether or not the previous pixel was glitched by setting the previousPixelGlitched variable to true or false, if it was, there’s a higher chance that the code will glitch the current pixel. This type of structure will result in lines of glitched pixels, rather that just randomly positioned glitched pixels, which ends up looking like static.

The sketch generates a new random color for the randomColor variable before glitching any pixels and each time a pixel is not glitched. This means that each line of glitched pixels will have a new random color available to it.

// random color 
// 0-255, red, green, blue, alpha
color randomColor = color(random(255), random(255), random(255), 255);

The sketch generates another random number, this time between .5 and 1, and uses this as a mix ratio to mix the random color with the current pixel’s color.

// percentage to mix
float mixPercentage = .5 + random(50)/100;

// mix colors by random percentage of new random color
img.pixels[y + x * img.height] = lerpColor(pixelColor, randomColor, mixPercentage);

For the featured image of this post I adjusted the random color generator to always use 255 (the maximum) blue and thus the resulting image contains colors from the cool range of the spectrum.

In short, this script creates lines of random length and of random colors and mixes them into the original image. I also added some commented out lines that illustrate how to apply filters to the entire image in Processing, uncomment them to see how they affect the result.

// apply some filters
// https://processing.org/reference/filter_.html

// posterize filter
// filter(POSTERIZE, 4);

// dilate filter
// filter(DILATE);

Some ideas for experimenting with this script might be changing the mixPercentage randomness, or, as I did, adjust the random color to be less random by replacing any of the three random(255) with a number between 0 and 255. Instead of glitching pixels randomly you could use a counter, or geometric function (sin, cos, etc) in the loop to glitch pixels in mathematical patterns.

If you’re feeling intimidated by the simple glitch script I created a super simple glitch script you can download here. The super simple glitch script doesn’t actually do anything except loop through each pixel in the image, so it’s ready for experimentation. #corruptabsolutely

iOS (iPhone, iPad)

Windows

OSX

Processing

How to glitch images using pixel sorting

Pixel sorting is the process of isolating a horizontal or vertical line of pixels in an image and sorting their positions based on any number of criteria. For instance pixels positions may be sorted by each pixel’s luminosity, hue or saturation. Manual pixel sorting, while possible, would be overly time consuming, instead Pixel sorting is accomplished using scripting or programming languages.

If you don’t have the time or inclination to pixel sort images using scripts you can use dedicated apps such as Glitch for iOS.

glitch4ios

One popular programming language for pixel sorting is Processing. To get started download and install the latest version of Processing, version 3.1.1 at the time of writing this. Next select a pixel sorting script to start from, my own pixel sorting scripts are not written for Processing so for the purposes of this tutorial we’ll use a popular script made available by glitch artist Kim Asendorf, the ASDF Pixel Sort.

Download the ASDFPixelSort.pde from Kim’s GitHub repository by clicking the green button labelled Clone or download and select Download ZIP. If you’re familiar with GitHub you can do this a number of other ways. Once you’ve downloaded the ZIP you can extract the sorting script and open it in Processing by selecting:

File > Open

And navigating to the ASDFPixelSort.pde script file. In the script, which are referred to as sketches in Processing, you’ll need to change the following lines to point the script at the image you want to pixel sort:

// image path is relative to sketch directory
PImage img;
String imgFileName = "MyImage";
String fileType = "png";

For this tutorial we’ll use a PNG, though Processing supports GIF, JPG and TGA as well. Place your PNG in the same directory as the ASDFPixelSort.pde (which Processing may have placed in a new sub directory) and update the script with the filename.

Once you’ve updated the script with the name of your file simply press the Run button at the top left of the Processing window (it looks like a play button) and in a few seconds you should see a window with the results, a new image should also be saved to the sketch directory.

pixel-sort-run

This particular script loops through both the columns and the rows of the image, but it doesn’t pixel sort the entire column or row, if it did, the result would look more like a blank gradient than anything interesting. Instead for each column and row it looks for a pixel to start sorting on and then it looks for a pixel to stop sorting on — this makes the algorithm somewhat intelligent resulting in identifiable elements of the image being left untouched.

In order to decide which pixel to start sorting on and which to stop sorting on this script can operate in three different modes. The mode can be changed by adjusting the mode variable, by default it is set to 1, but can be changed to either 0 or 2 as well. Different modes will work better depending on the image itself.

 sorting modes
 
 0 = black
 1 = brightness
 2 = white
 
 */

In mode 0, or black mode, the script will begin sorting when it finds a pixel which is not black in the column or row, and will stop sorting when it finds a black pixel. The script identifies black pixels by comparing the pixel’s color value to a threshold, if it’s lower than the black threshold the pixel is deemed to not be black, if it’s higher it’s deemed to be black. You can adjust this threshold by changing the blackValue variable which is by default set to -16000000.

suit-0

In mode 1, or brightness mode, the script will begin sorting when it finds a pixel which is bright in the column or row, and will stop sorting when it finds a dark pixel. The script identifies black pixels by comparing the pixel’s brightness value to a threshold, if it’s lower than the brightness threshold the pixel is deemed to be dark, if it’s higher it’s deemed to be bright. You can adjust this threshold by changing the brightnessValue variable which is by default set to 60.

suit-0

In mode 2, or white mode, the script will begin sorting when it finds a pixel which is not white in the column or row, and will stop sorting when it finds a white pixel. The script identifies white pixels by comparing the pixel’s color value to a threshold, if it’s lower than the white threshold the pixel is deemed to not be white, if it’s higher it’s deemed to be white. You can adjust this threshold by changing the whiteValue variable which is by default set to -13000000.

suit-0

The script can also be run many times to apply the pixel sorting effect multiple times. This can be set by adjusting the loops variable which is by default set to 1.

int loops = 1;

// threshold values to determine sorting start and end pixels
int blackValue = -16000000;
int brightnessValue = 60;
int whiteValue = -13000000;

Pixel sorting is a powerful, and fun, concept. Start by trying out different modes and adjusting the various threshold values. From there you can try moving the row sorting above the column sorting, this will result in more visible vertical sorting (similar to the featured image of this post) as whichever sort is performed last will have the greatest impact on the final image. Alternately you can rotate your image in image editing software before pixel sorting it and then rotate it back to accomplish a similar result. If you break the script, just download the original and get back to experimenting.

  // loop through columns
  while(column < width-1) {
    println("Sorting Column " + column);
    img.loadPixels(); 
    sortColumn();
    column++;
    img.updatePixels();
  }
  
  // loop through rows
  while(row < height-1) {
    println("Sorting Row " + column);
    img.loadPixels(); 
    sortRow();
    row++;
    img.updatePixels();
  }

Some scripts haven’t been updated in a while. If the script you are trying to use is having errors (that don’t seem to do with not finding your image) right from the get-go you might want to try an early version of Processing, versions 2.2.1 and 1.5.1 are listed towards the bottom of the download page.

For more advanced pixel sorting scripts you can have a look at Jeff Thompson’s GitHub which has a number of examples. At the time of writing this I was experiencing errors running them though — they may need updating to function correctly, or at all. If you’ve got the hang of Processing than there’s no reason why you can’t craft an entirely original script. There are two main concepts to explore here, the first is how to determine which pixels to sort, and the second is how to sort them. I’ve had success experimenting with hue based sorting, as well as combining pixel sorting with Sobel edge detection algorithms. #corruptabsolutely

iOS (iPhone, iPad)

Windows

OSX

Processing

How to glitch images using audio editing software

Images can be pleasantly destroyed in a great number of ways, some of the best results come from applying transformation algorithms to the raw image data. Applying filter algorithms to images is something one would normally use software like Adobe Photoshop for, however, using audio processing software instead can yield much more interesting, and unexpected, results.

If you don’t have the time or inclination to manually glitch images with audio processing software you can use dedicated apps such as Glitch for iOS.

glitch4ios

Firstly we’ll need some audio processing software, many will work, Audacity is free, supports many platforms and works quite well for glitching images. Secondly we’ll need a databending-friendly image, the BMP format works well for this type of bending. Once we have an image and Audacity installed, open Audacity and import the image by selecting:

File > Import > Raw Data

audacity-importraw

Audacity will then ask for some information about the file we are importing, we’re going to lie, for Encoding select either U-Law or A-Law. We will have to export with the same encoding setting so remember which was selected. Defaults will work fine for the rest of the import options.

audacity-import

The image will now be open as an audio file, I don’t suggest pressing play. Now we can select any portion of the file or its entirety by clicking and dragging on the waveform (the chart-like display). In some cases it’s better avoid selecting the beginning (first 5-10 seconds of the waveform) of the file as this contains the file header, a section of the file which contains information needed to display the image, if the image won’t display after exporting consider leaving the header intact.

Once we have a selection, we can apply any of the filters under the Effects menu. I have found the Invert, Reverb, Reverse, Wahwah, Compressor and Echo work quite well, but here is where you can experiment. You’ll see the waveform change as each filter effect is applied. The hero image of this post was created using the Compressor and Echo filters applied to the entire file.

Once we’ve applied one or more filter effects we can export the data back to an image by selecting:

File > Export Audio

Change the filename back to the proper image extension, in this case BMP. The Save as type should be set to Other uncompressed files, the Header should be set to RAW (header-less) and the Encoding should be set to either U-Law or A-Law depending on which was chosen during the import process.

audacity-export

Audacity may complain that not all is well with the filename, and perhaps prompt for metadata but these prompts can be accepted and ignored.

All that’s left is to check the result — in an image viewer, not a music player. #corruptabsolutely

Audacity
Audacity Forums

How to glitch JPG images with data corruption

Glitching JPG (or JPEG) images by corrupting their data is a relatively straight-forward affair. Simply open up the file in a hex editor and wreck up the place. Corrupted JPG images can be identified by the telltale offset horizontal bands of changing hues and small square sequences of artifact patterns at the beginning or end of these bands.

If you don’t have the time or inclination to manually glitch JPG images you can use dedicated apps such as Glitch for iOS.

glitch4ios

If you don’t have a hex editor installed there are some freeware options list at the bottom of this post. Hex editors allow us to view and edit the bytes of a file using hexadecimal. Editing the file using hex rather than text allows greater flexibility since we’re no longer restricted to text characters (which are each represented by two hex digits). Most hex editors display both hex and text (also known as ASCII) in the same view but in separate columns. You can see a JPG open in a hex editor in the image below.

hex-exif

Get started by making a copy of a JPG and open the copy in a hex editor — never edit the original file. The first bytes of a JPG file contain what’s know as the file header. The header contains information that is required for the image to be displayed at all and should be left intact (though feel free to experiment). We need to locate the meat of the file, the raw image data, we can usually tell the raw data apart from the header and other important structural data by it’s garbled nature.

hex-jpg

We can see where some data ripe for glitching is in the above example where the file changes from structured, to seemingly random data. Not to say that there’s no structure, it’s just harder to discern in compressed image data. Once we’ve identified the raw image data we can copy/paste chunks, search/replace sequences or just manually corrupt the data by changing the text (on the right side in the example) or the hex (on the left side in the example) of the raw data.

Now we can begin the process of making changes and checking the result in our favorite image viewer. Making backup copies after every successful change will avoid heartaches when, not if, a misstep renders the image unviewable.

artifacts

Corrupting JPG images often results in interesting patterns due to the corrupt data and the compression algorithms used, as seen enlarged in the example above. Decreasing the quality of the JPG itself, which can be done with image editing software, can sometimes increase the likelihood of generating these artifacts through corruption.

This method can also be used to glitch some other formats as well, most notably BMP files.

As with any glitch-by-corruption technique, too little has no effect, too much can destroy the file, but just enough results in glorious, glorious corruption. #corruptabsolutely

iOS (iPhone, iPad)

Windows Phone

Windows

OSX