Sometimes glitching images can be as easy as opening them and saving them again — and that’s exactly the case when image bending with Microsoft WordPad. WordPad is a basic word processor that is included with almost all versions of Microsoft Windows from Windows 95 onwards. If you are running Microsoft Windows then you’ve probably got WordPad on your system, and you can datamosh images with it.
If you don’t have the time or inclination to glitch images using WordPad you can use dedicated apps such as Glitch for iOS.
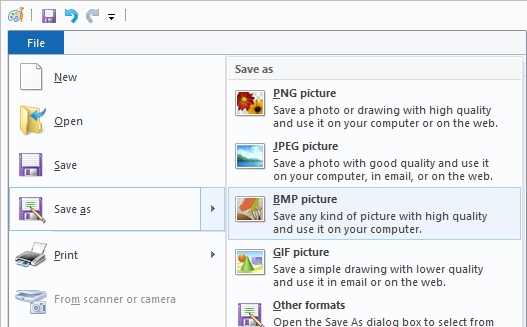
To start glitching with WordPad we need to convert our source image to a BMP (Bitmap) file. This can be done with any image editing software, but since this tutorial is about WordPad we’re going to use one of its fellow Microsoft applications, Microsoft Paint, which is also included with most versions of Microsoft Windows. If you can’t find Paint, press the Win + R keys, type in “pbrush” and press Enter, Paint should open. Open your file and then choose Save as and BMP picture.
Then select 24-bit Bitmap (*.bmp;*.dib) from the Save as type dropdown, other types of BMP will work as well to varying degrees.
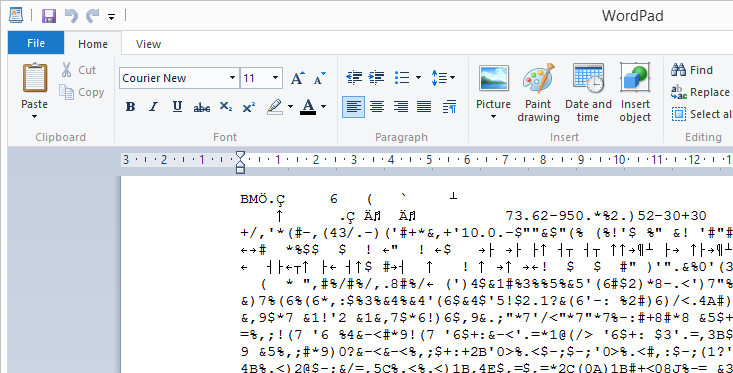
Next we need to open the BMP in WordPad. If you can’t find WordPad, press the Win + R keys, type in “write” and press Enter, WordPad should open. Open your BMP image in WordPad by selecting All Documents(*.*) in the dropdown beside the File name field.
Wait for WordPad to load the image as a document and then press Ctrl+S on your keyboard to Save or use the menu to Save the file.
That’s all there is to it. The process of opening and saving the image using WordPad invokes what has been dubbed the WordPad Effect. You can also try deleting some random text from the file before saving, but it’s not required to glitch the image. The splash image for this post was simply opened and then saved, the WordPad Effect did the rest.
So what’s going on here? For the curious, a cursory comparison of the before and after files seems to confirm my suspicion that the transformation, at least in some part, has to do with WordPad converting line breaks when it loads in the image. Line breaks are some bytes that tell text editors and word processors where they should break the text and continue on the next line.
Different operating systems handled them slightly differently, the bytes involved are what’s called a Line Feed, represented by 0x0A in hexadecimal, and a carriage return, 0x0D in hexadecimal. This nomenclature comes from mechanical typewriters where a line of physical paper is fed through the roller (line feed) and the carriage is returned to the beginning of the line (carriage return). In text editors the meaning is the same, a 0x0A tells the editor to move to the next line and a 0x0D tells the editor to move to the beginning of the line.
Image files don’t contain any line feeds or carriage returns, but since WordPad looks at the image data as if it were text it looks for 0x0D and 0x0A in the image file which mean something completely unrelated for images. WordPad attempts to clean up what it thinks is a text file by ensuring that all line breaks have a line feed and a carriage return, so when it finds 0x0D without an accompanying 0x0A, it adds one, and when it finds an 0x0A without an 0x0D it adds one there as well. Because 0x0A and 0x0D mean different things for images, when WordPad thinks it’s correcting a text file in actuality its corrupting the image — et voilà, the WordPad Effect. #corruptabsolutely


